This is a general set of guidelines targeted for Azure administrators and Lab Creators responsible for creating Azure Labs. We assume you have already created a Lab Plan (Previously Lab Account). Additionally, to create a lab, you need to be a member of one of these roles in the lab plan: Owner, Lab Creator or Lab Contributor. Learn more about Azure Lab Services built-in roles here.
If you are new to Azure Lab Services, check out my blog post about using Lab Services for teaching.
Preparation
There are a few questions to ask the course educator(s) before setting up the lab:
- In Windows images, is Docker needed? (Helps to decide if nested virtualization is required or not)
- Does the course educator need to connect to student virtual machines (VMs) to evaluate their work? Or will students report in a different way? (Helps when configuring the VM login credentials)
- What size of the VM and what operating system (OS) is needed? (Required to know when creating the lab and cannot be modified later)
- In Linux images, is there a need for GUI access to the VM? (Helps when configuring access to the VMs)
Create the environment
- Go to Azure Lab Services web portal and sign in with your account.
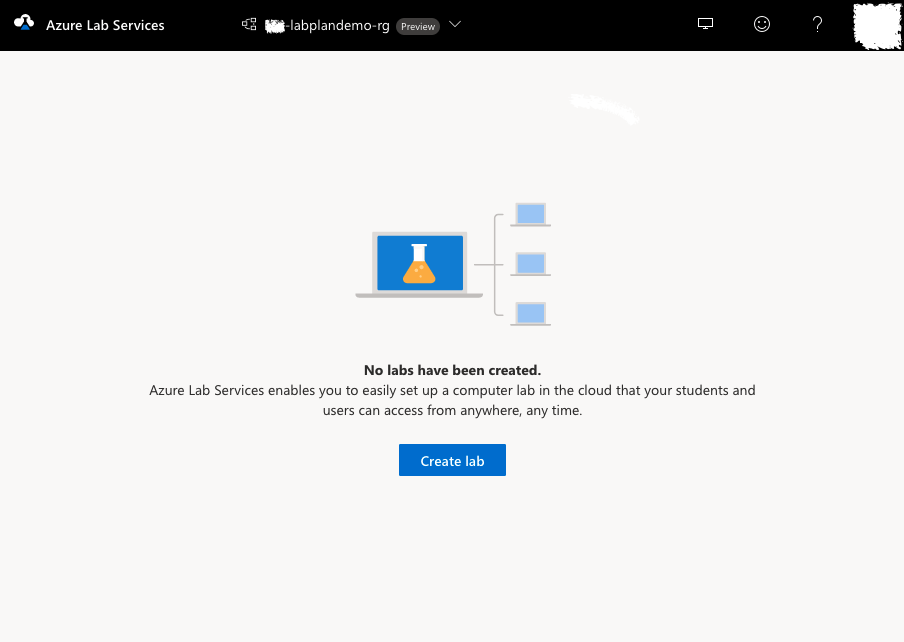
- Select Create Lab and in the New Lab window, fill in the fields based on these instructions:
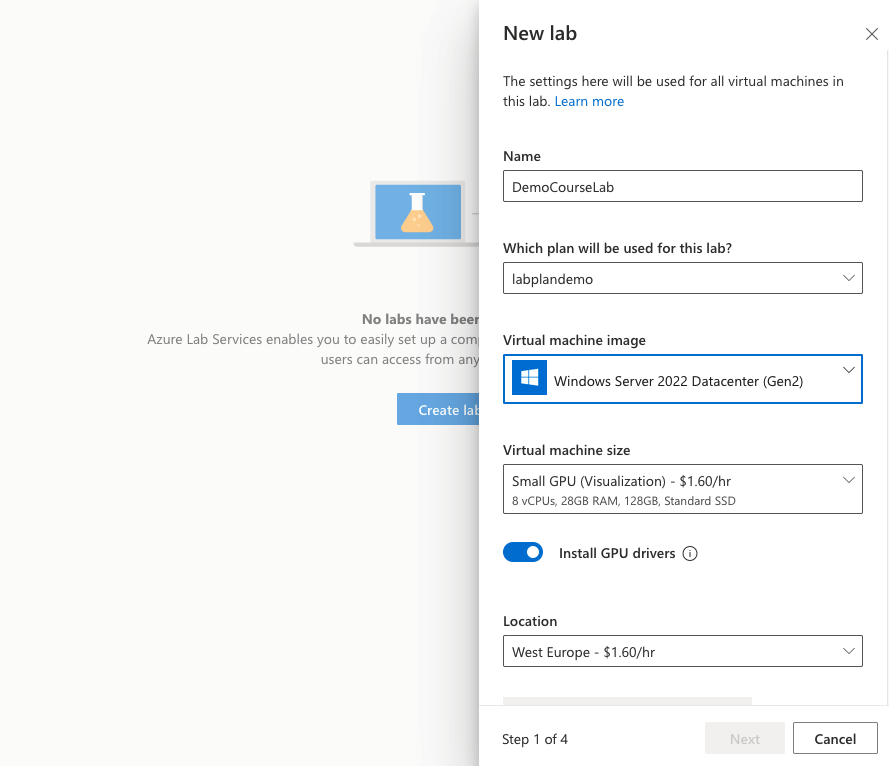
- The name of the lab is what students will see when they come to the portal
- Select a lab plan if you have more than one lab plan created in the resource group.
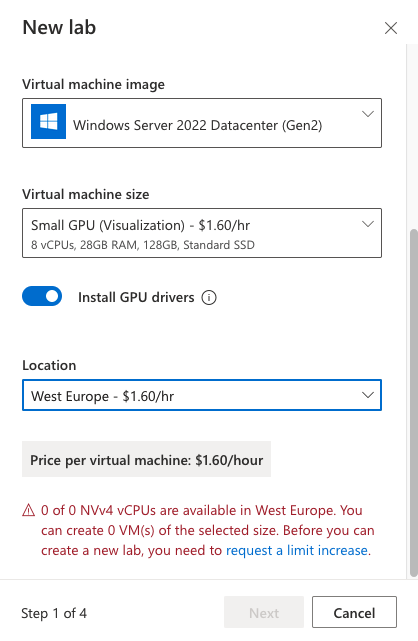
- Virtual machine image: Select the required image. Some images are not enabled and need to be enabled from Lab Plan. For example, I needed Ubuntu server 20.04 LTS which was not enabled by default. To enable some images, you might need to accept terms and conditions of third-party providers.
- Virtual machine size: Choose the size (cannot be changed later): For example, I chose small GPU (Visualization) as shown in the picture.
- You have the option to install the GPU drivers.
- Location of the lab: Select based on your regulations and needs. E.g., West Europe ($ 1.60/hr)
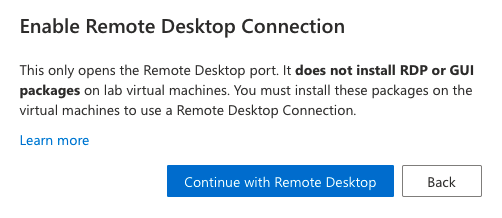
- SSH is automatically enabled. If you need GUI access to Linux VMs, check the Enable Remote Desktop Connection option. Read more
- Depending on your subscription, you might see a message about the availability status of virtual machines in your region. You can request a limit increase. Learn more about limits and make sure to leave enough time for your request. This can take days/weeks depending on your region and other customers’ demand.
Click Next and the second step will show up:
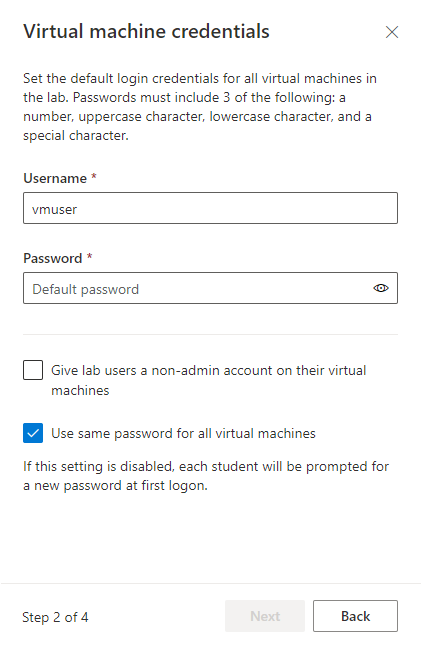
- Set the default username and password for the template VM. You have the option to set the same password for the virtual machines or let each student choose a password when they first try to log on.
Select Next to go to step 3:
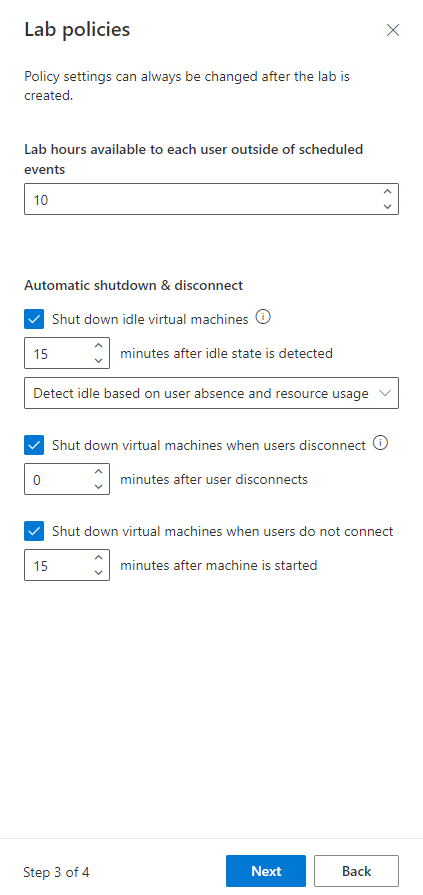
- On Lab Policies page, you can change the default settings for automatic shutdown and lab hours available to each user outside of the scheduled events. You can change these settings anytime later during the course.
Select Next to go to step 4:
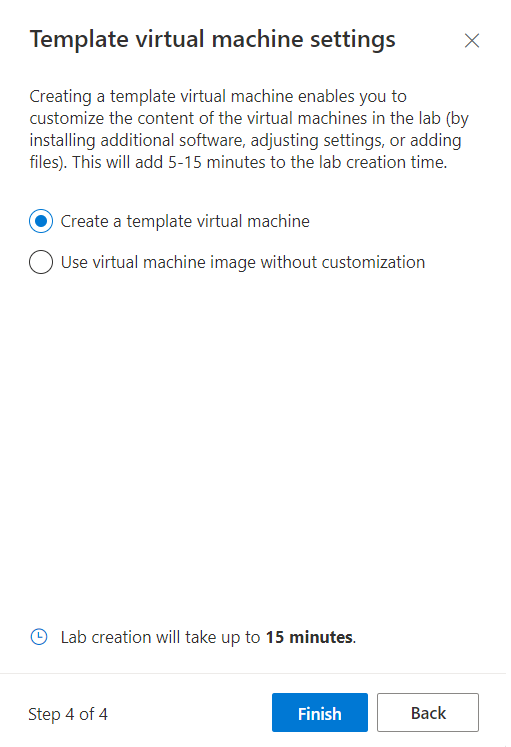
- In most cases you need to customize the virtual machine image for your course. For example, you need to install some additional software packages, upload the necessary files to the template virtual machine, disable some OS functionality, etc. Therefore, I recommend going with creating a template virtual machine option.
Click Finish. It will take about 20 minutes to create the lab.
Congratulations, your lab is ready to be configured for students. Please keep in mind to reserve enough time (I recommend at least 10 working days) before starting the course for setting up the lab, configuring and testing it.